Deutsch
 English
 Francais
 Español
 Italiano
 Nederlands
 Polski
You are here: / Bresser Junior / Luna
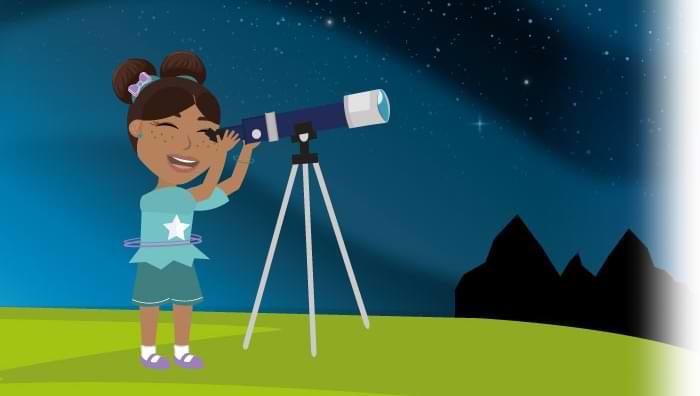
Luna and the world of astronomy
Luna will teach you all about astronomy in the most fun way possible. She will introduce you to our planets, help you with your observations with your telescope and give you some exciting information about space. There are some fantastic colouring pictures and much more to enjoy.
Ready?
Table of contents
The big bang
Many astronomers believe that the universe was created by an explosion – not an explosion as we might imagine it, because an explosion can usually only occur in ‘space’. By contrast, the big bang happened in a void, in nothing. There was no space, no time and no matter. No one knows what happened before the big bang.
It all began around 13.8 billion years ago. The universe was very small, about the size of a small dot made by a pen. The inside of this bubble was extremely dense and had a temperature of over 1 octillion degrees Celsius (1,000,000,000,000,000,000,000,000,000)! Everything – time, space and matter – came into existence as the result of a powerful explosion, the big bang. Since then, the universe has been expanding in all directions and it continues to grow steadily.
Over the course of time, the universe continued to grow but more slowly, and began to cool. This is when the first light particles and matter particles were formed. At that time, there was a dense fog in space. It only took a few minutes for the more stable particles – the protons and neutrons – to form. These are the components of atomic nuclei.
The universe subsequently cooled and expanded to such an extent that the matter particles began to combine to form whole atoms. During this time, it was mostly hydrogen and helium that were being formed. The fog began to clear and light began to shine.
The universe continued to cool and the first galaxies were born. As small clumps of gas broke apart, the first stars began to form.
The burnt-out stars ultimately created clouds of gas and dust which paved the way for the formation of our Earth, other planets and moons. By that point, the universe had cooled to a temperature of minus 270 degrees Celsius.
Our solar system was in turn formed from an exploded, extinct star. The explosion created clouds of gas and dust, which began to spin around themselves with increasing speed. The force of gravity caused these clouds to pull together, thus becoming a star – our sun. A small portion of material was left over and when the sun began to shine, the remaining part was pushed outwards.
Our planets were formed over the course of time by the heavy clouds of dust and fragments of rock that could not be pushed outwards when the sun was formed. The inner part of our solar system contains rocky planets, while the outer part of the solar system contains gas planets – this is because the more lightweight matter has been pushed outwards. The sun, through it gravitational pull, holds everything together even today.
The life of stars
Have you ever wondered where all of those many stars in the sky come from? Scientists have seen lots of ‘young’ stars in certain areas of space – what we call ‘nebulae’. They believe that this is where stars are formed. A nebula is made up of thick clouds of dust and gases, the most important being hydrogen and helium.
But how do stars form in the nebulae?
1. The gases inside the cloud attract one another thanks to their own gravitational pull, forcing them to grow together.
2. The pressure inside increases substantially as the particles in the cloud are, quite literally, pressed together.
3. The rising pressure also causes the temperature to increase. The hydrogen begins to fuse into helium and the energy that is released causes the star to shine.
4. This nuclear fusion then creates counter-pressure and heat on the inside. This stops the thick cloud from contracting even further – instead, it forms into a stable and glowing gas sphere.

When does a star go out? Let’s look at our sun as an example.
1. Our sun has been shining for around four billion years, and without it, life on Earth wouldn’t be possible. It will slowly increase in brightness and heat our planet.
2. In around five billion years’ time, so much helium will have accumulated at the core of the sun that the nuclear fire there will be extinguished. For this to happen, the hydrogen around the core will begin to burn, which will lead to increasing amounts of energy being released. The sun will then swell and become a ‘red giant’.
3. The sun will expand to 150 times its current size and radiate 2,000 times more fiercely than it does now. In the process, it will swallow up the inner planets Mercury and Venus and heat the Earth to over 1,000 degrees Celsius, at which point, life on Earth will no longer be possible.
4. By now, the quantity of helium at the core will have increased to such an extent that its atomic nuclei will begin to fuse. On top of that, the hydrogen in the envelope will continue burning.
5. Additionally, oxygen and carbon atomic nuclei will form and accumulate in the centre of the sun as ash from the helium fusion.
6. The sun will no longer be able to hold on to its envelope due to the high pressure and will push it away. The envelope will become illuminated by the core and appear as a nebula from which, once again, new stars can be born.
7. As time progresses, the core of the sun will continue to cool down and lose its brightness. What’s left will be a ‘white dwarf’, comprising dense carbon and oxygen that will be the same size as Earth.
It will be a long time before the sun stops shining – in fact, longer than life has existed so far!
The structure of the sun

The sun has many different layers.
The core is home to constant nuclear fusions, which give rise to a temperature of around 15 million degrees Celsius. Around the core is the plasma. This layer guides the light outwards to the surface, which takes more than 100,000 years. The third layer is the convection zone, in which large gas masses rise. They cool as they rise, and sink inwards. This process is known as convection.
The brightest layer is the photosphere, where the temperature is around 6,000 degrees Celsius and the gas layer is impenetrable. Here, the energy from inside is emitted to the outside as radiation.
The solar atmosphere is formed from the chromosphere and the corona.
The chromosphere has a reddish glow, and the temperature is around 10,000 degrees Celsius.
At the very outside is the corona, which consists of thin gas and is only visible during a total eclipse of the sun when it is seen as a bright white ring.


Solar eclipse

An eclipse of the sun or solar eclipse occurs when the moon covers the sun as seen from Earth. This requires the moon, sun and Earth to be in a line. The sun is larger than the moon, but it is much farther away. That is why we see both celestial bodies at the same size along the horizon. When the moon and the sun are at the same height as Earth, the moon casts a shadow over the Earth. When the moon moves fully in front of the sun, it is referred to as a total solar eclipse. A partial solar eclipse occurs when the moon passes in front of the sun only in part.
Unfortunately, solar eclipses are not always visible in Europe because the Earth and the moon rotate all the time. The next partial solar eclipse that will be visible from Germany will be on 25 October 2022. The next total solar eclipse will be on 3 September 2081.

Luna explains
Never look at the sun without using a sun filter! Otherwise, you risk serious damage to your eyes. Use special eclipse glasses to observe a solar eclipse – you can get them from us!
Our Earth – the blue planet
Creation
2. Meteorites continued to hit the Earth, causing it to heat further and remain liquid. Our Earth consisted of a sea of fire made of liquid rock for a very long time, like a large glowing ball, with a surface temperature of around 4,700°C.
3. After several million years, the impacts lessened and the surface temperature began to fall, allowing the rock to solidify and the Earth to form a crust. At the same time, the moon also formed, and has been a constant companion to the Earth ever since. At the time, one day was only six hours in length.
5. Over the course of time, the Earth’s crust cooled to the extent that water could begin to accumulate. Scientists believe that the water was brought to Earth by asteroids. Initially, there was no oxygen and the temperature at the time was somewhere between 55 and 88°C.
6. The opportunity for life to survive only came about when the ozone layer had formed to protect the surface from harmful radiation.

The structure of the Earth
Our Earth has multiple layers, think of it as a nectarine. The outer layer is the crust. Under the crust is the mantle, followed by the outer core and inner core. The core is around 6,371 km from the surface. The temperature inside increases by 3°C around every 100 m. The inner core is extremely firm because of the extreme pressure at that point – all layers press on the inside of the core.
The Earth’s crust
Mantle
The core

The atmosphere
The air envelope of our Earth is known as the atmosphere. It is a gas envelope that surrounds and protects the Earth. The higher up we go, the lower the air pressure becomes. The atmosphere has several layers, each with a different temperature.
This is the layer in which the complete water cycle occurs
Temperature at the upper limit: -80°C
Stratosphere
This is the layer in which the ozone layer is found
Altitude: approx. 15 km
This is the layer in which UV radiation is converted into heat
Temperature at the upper limit: approx. 0°C
Mesosphere
Above approx. 50 km
This is the layer in which dust particles and small pieces of rock burn up and are visible as ‘shooting stars’
Temperature: -100°C
Thermosphere
Above approx. 85 km
This is the layer in which the ISS and space shuttles orbit
Temperature: up to approx. -1,700 °C
Exosphere
Above approx. 500 km
This is the layer in which gravity decreases
The farther you move away from Earth, the lower the temperature becomes

The Milky Way
The Milky Way consists of lots of nebulae, gas clouds and countless stars. Amidst it all is our sun and its planets.
Because of the how the Milky Way looks, the Greeks used to believe that milk had been spilt up there in the sky. In fact, that white colouring is because there are billions of stars that blur into a white band when viewed with the naked eye.
The Milky Way, which is a barred spiral galaxy, contains 100 to 300 billion stars, only 6,000 of which are visible from Earth. The others are too far away or just not bright enough to be visible. We can also see stars that are outside of the Milky Way, mostly above or below the Earth. We can even observe some stars that are in neighbouring galaxies.
The Milky Way is around 100,000 light years across, and 3,000 light years high. At the centre is a ‘bulge’, the heart a spiral galaxy. The bulge forms beyond the disc plane and is extremely bright. In most cases, there is a black hole behind it that attracts stars to it. Our galaxy is not the largest – when compared to the billions of galaxies within the universe, the Milky Way is only medium in size.
Galaxies
Galaxies are gigantic groupings of stars. It’s impossible to guess just how many stars there are in the universe, but there are most likely millions of galaxies, each containing billions of stars.
We live in a galaxy known as the Milky Way. We can’t see what our galaxy looks like from the outside, we can only guess. The Milky Way is a barred spiral galaxy, but there are other types:

Elliptical galaxy
This galaxy is circular or elliptical in shape, has no spiral arms and otherwise has no fixed structure.

Irregular galaxy
This galaxy has no particular shape and is just a collection of stars.

Spiral galaxy
The number of spiral arms can vary and the galaxy rotates clockwise or anti-clockwise.

Wagon wheel galaxy
This galaxy has lots of stars at the outside and in the centre, and very few in between.
Comets and asteroids

Comets
Comets are remnants from the early days of the solar system. They are found in the cold outer regions of the solar system, beyond the planet Neptune, where there are millions in orbit. Comets are several kilometres in diameter and consist mainly of frozen water and carbon dioxide. Sometimes, comets can turn out of their orbit and fly towards the sun, which causes the ice to heat up and evaporate. This dust and gas creates what we call the ‘coma’, which in turn creates the comet’s tail.

Asteroids
Asteroids are loose, cohesive heaps of debris that orbit the sun. They vary in size from a few metres to 1,000 km. Their own gravitational pull is not sufficient for them to become planets. Most asteroids are found in the asteroid belt between Mars and Jupiter. Just like comets, they date back to when the solar system was formed.
Meteoroids, meteors and meteorites – what’s the difference?


Meteor
Atmospheric light phenomena, such as when meteors, comets or asteroids enter the Earth’s atmosphere, are known as meteors. These bodies heat up and light up when they enter the Earth’s atmosphere, at an altitude of around 100 km. We see them as bright trails in the night sky. Meteors are also referred to as shooting stars and fireballs.

The telescope
Telescopes come in all different designs, sizes and systems. For beginners, it can be tricky deciding which model is the right one. An experienced astronomer once said: ‘Every telescope has its sky’, and it’s true! How does a telescope work and what types of telescope are available?

Reflector telescope (reflectors)
The eyepiece is located on the side, so you look into the telescope from the side
These telescope are usually wider or larger
The picture is always upside down and mirror-inverted
The light is reflected by a mirror inside
There are two mirrors – the main mirror and the secondary mirror
The main mirror is located in the rear section of the tube and bundles the light
The secondary mirror directs the bundles light towards the eyepiece
Different designs are available, such as the Newtonian telescope or Dobsonian telescope

Refracting telescope (refractors)
These telescopes usually have a single lens made of two lenses separated by an air gap (achromatic lenses)
The eyepiece is located at the rear of the telescope, so you look into the telescope from behind
These telescopes are often long and narrow
The lens collects the incoming light and focuses it at a focal point
An eyepiece at the focal point magnifies what you see
The distance between the lens and the focal point is referred to as the focal length
Most suitable for beginners

The finder scope and first use

Many telescopes have an additional small telescope attached. Ever wondered what that smaller telescope is for?
Have you ever tried to search for planets in space with just your eyes? If you have, you’ll know that it’s almost impossible. The finder scope makes things easier for you. Once you have located an object, align the cross hairs so that the object is in the centre. Through the finder scope, everything will appear upside down and mirror-inverted, although when viewing the sky, that won’t matter.
Looking through a telescope for the first time
It’s easiest to use your telescope during the day on the first occasion. Choose an object that is farther away – a church tower , a tree or a sign is a good starting point.Point your telescope at your selected object
Align your finder scope at your object – it should be in the centre of the cross hairs.
Now look through your eyepiece. Can’t see anything? Then turn the wheels until the picture is nice and sharp.
To be able to zoom in, you will need to change the eyepiece. Make sure that you always have the picture in focus.
Telescope accessories
Most telescopes come with accessories. So that you know what the accessories are for, we’ve provided a brief summary of the important considerations:


Luna’s tip
Discovered something and want to be able to capture it so that you never forget it? Many of today’s telescopes have an adapter for your mobile phone. You simply place the adapter in front of the eyepiece and then secure your phone so that you can take photographs.
Take a look here: Smartphone adapter


Tips and tricks
Use your telescope the first few times when it is bright. Once you understand how everything works, there’s nothing to stop you from observing the stars
Never observe the night sky through a window or door as it’s almost impossible to focus the picture through glass
Work your way slowly through magnifications – it is easier to start with the smallest magnification
The observation site must be as dark as possible
Keep an eye on the weather. Observation can be difficult, depending on the weather.
Never wipe over the lens with a cloth!
Stay calm and relaxed – it takes time!
Download the Star App or print out a star chart to help you find your way around the sky.
Luna explains:
Don’t be disappointed if things don’t look quite how you had expected – photos in the media are mostly edited.
What’s more, the photographs in the slider were taken by professional astronomer Marco Hodde of our astronomy team.


The magnifying glass experiment
What you will need
A magnifying glass
Something combustible, such as a dry piece of wood or a sheet of paper
Direct sunlight
Water for extinguishing
What to do
1. Place the combustible material on the ground. Make sure that this is a stone floor so that the subfloor underneath does not catch fire.2. Move everything nearby away so that nothing else catches fire accidentally.
3. Hold the magnifying glass over the combustible material so that the sun shines through the magnifying glass and onto the material.
4. You will see a bright spot on the material – try to make sure that it’s as small as possible. The smaller it is, the more heat will be generated.
5. Keep your hand still and the wood or paper will soon begin to smoke.
6. Once done, put everything out with the water.
Beware:
You should only try this experiment outside; make sure that you have an adult with you! Do not point the magnifying glass at the eyes, skin or any other objects!
The magnifying glass experiment


Solar system – assembly instructions
You will need
1 extra-large polystyrene ball for the sun
2 large polystyrene balls for Jupiter and Saturn
2 medium-sized polystyrene balls for Uranus and Neptune
4 small polystyrene balls for Earth, Mars, Venus and Mercury
1 extra-small polystyrene ball for the moon
1 polystyrene panel for the rings of Saturn
Different colours (e.g. acrylic craft paint)
Yarn or string
Skewers
White craft glue
1 metal or wooden ring
Scissors
Cutting knife
Brush to paint the planets
Tape measure
Water glass
Here’s how to make your solar system
1. Insert one skewer into each of the polystyrene balls, as this will make it easier to paint them.2. Paint your polystyrene balls in the colours of the sun, the planets and the moon. Place the skewers and balls in the glass to dry.
3. For the rings around Saturn, use the tape measure to measure the diameter of the ball you are using for Saturn. Then, draw two circles on the polystyrene board, each with a different size. The inner circle should have the same diameter as the ball used for Saturn. Get an adult to help you cut out the ring from the polystyrene with the cutting knife and smooth out the edges. You can also put your ring on a skewer and paint it.
4. Once everything is dry, assemble your Saturn. To do this, apply glue to the inside of the ring and press the ball into it. Be careful that the ring doesn’t break. Set your finished Saturn to one side to dry.
5. Now, take the moon and shorten the wooden skewer inserted through it. Using the skewer, make a small hole in the Earth and fill the hole with glue. Push the wooden skewer holding the moon into the hole and allow the glue to dry.
6. Time to cut the strings that your planets will hang from. These must be of different lengths. Remember that the farther away a planet is from the sun, the longer the string will need to be. Neptune should therefore hang the lowest, so its string needs to be the longest.
Solar System

7. Attach the strings to the planets and the sun. To do this, remove the skewers from the planets and the sun and tie a knot at the end of each string. Fill the hole in the planet with a little glue and push the knot into the hole with the aid of the skewer. Leave everything to dry thoroughly.
8. Tie the other end of each piece of string firmly to the wooden or metal ring. Make sure you that you do it in the right order – Mercury, Venus, Earth, Mars, Jupiter, Saturn, Uranus and Neptune. You can secure the strings with a small amount of glue so that nothing slips.
Beware:
Ask an adult to help you if you need it! Please do not use the cutting knife alone!