Field report of the Bresser NT-150S / 750

by Marco Hodde

On February 20, 2018, it was possible to scrutinize the NT-150S / 750 under a clear sky.

Bresser NT-150S/750

Bresser NT-150S/750

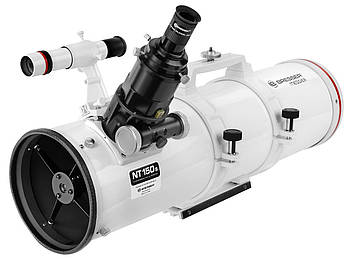
The telescope: An aperture of 150 mm and a focal length of 750 mm results in an aperture ratio of f / 5. In my opinion, this opening ratio is very good for an all-rounder. If I would rather tend to faster aperture ratio in Deep Sky observations (f / 4 or even f / 3), they don’t accept any tolerance in the adjustment, which is reflected in the figure. For planetary observations larger aperture ratios are rather possible (f / 5 to e.g. f / 13).  

Conclusion: With an opening of 150mm, a weight of just 5.5kg and an aperture ratio of f / 5, I think the device can be used as a multi-talent almost everywhere.

Go to the product here!

Thanks to the scope of delivery, I have the opportunity to observe the 1.25" and 2" eyepieces. That's not all. Even for astrophotography I can easily saddle a commercial camera on the integrated camera holder (attached to the handle).

Optical impression: After saddling the telescope onto my mount, the open tube has to cool down for about an hour that the primary mirror can reach the ambient temperature. This is important because the telescope has to adapt to the prevailing temperatures. Now we could start observing. With the included 26mm eyepiece you reach a magnification of 29x (750mm focal length / 26mm eyepiece = 29). The first view, how could it be otherwise, turned in winter time on the Orion nebula. It can be seen in its full size in the field of view. You can also see the trapezoid stars. Now a swing to the star cluster NGC 2158 and M 35. The star images are very beautiful and it's fun to let the abundance of stars leave its impression on you.

Conclusion: The opinion, you should enlarge as high as only possible is a huge misconception!!!! It is much more enjoyable to experience a high-contrast image at a lower magnification instead of struggling with the smallest possible magnification with a small field of view and a blurred image. My impression was definitely very positive. 

Photographic impression: To the photographic part of my report. Since I had optically arrived at the star cluster NGC 2158 and M 35, I also took this as my photographic target. To the data: The photos were taken with my Canon EOS 760d and the exposure times were at ISO 400 per 2.5 minutes. If you want to adapt your DSLR directly to the telescope, you only need an adapter ring from T2 to the matching camera bayonet. The included focuser offers to the 2" socket also a T2 external thread on the 1.25" socket.

An important aspect that needs to be clear to anyone who wants to use the telescope photographically: basically ALL Newton mirror telescopes cause a coma called error. This means that stars on the edge of the image field are warped oblong. The shorter the aperture ratio, the stronger this effect occurs. That's why I recommend a coma corrector. I have used a coma corrector from Explore Scientific in my recordings: EXPLORE SCIENTIFIC HR Coma Corrector: EXPLORE SCIENTIFIC HR Coma Corrector 

For comparison, I have inserted a single exposure with and without a corrector into my photographic result.

Conclusion: A very powerful telescope whose focal length is ideal for photographing fog areas such as the Orion Nebula. Due to the coma effect, a coma corrector is absolutely necessary. When using the Explore Scientific coma corrector, you also need the extension sleeve (that is included with the telescope) in order to get into focus. If you take a photo without a corrector, unscrew the extension sleeve from the focuser to get the correct focus.

NGC 2158 and M 35

NGC 2158 and M 35. 30 recordings at ISO 400 and each 2.5 minutes exposure time.

Images in high resolution

NGC 2158 and M 35 in high resolution: Click Here!

With Corrector: Click Here!

Without Corrector: Click Here!

Then, two days later on February 22, 2018, a starry sky appeared again. So I rebuilt the telescope. This time I wanted to take a picture of a fog. I chose the M 97 Owl Nebula and the M 108 Galaxy. Both should fit very well into the picture. The difference to the star cluster was photographically in detail. Since I live in the deepest light-polluted Ruhr area, I needed a fog filter. I tried the 2“ UHC Nebula Filter Explore Scientific, which I screwed directly to the coma corrector. The result below shows how many details the filter gets out of it and how much it blocks out stray light. 


M 108 and M 97 Owl Nebula

M 108 and M 97 Owl Nebula. 30 Recordings á 4 minutes at ISO 1600 and UHC Filter

Images in high resolution

M 108 and M 97 Owl Nebula in high resolution: Click Here!

With UHC Filter: Click Here!

Without UHC Filter: Click Here!

In the end, I realized that I really liked the telescope. Despite its relatively short focal length it delivers a great, bright image. With some accessories, the device can also be used very well for photographic purposes!!!

TrustedShops ExcellentShop 5 Jahre Award